Development workflow
Now that a QField plugin has been generated, let's dev it further !
Note
The following commands are to be run in the generated plugin directory, e.g. qfplugin-my-topologizer/ if the plugin name is My Topologizer (slugified to my-topologizer).
Load the plugin in QField
- Download a version of a QField build, pick a recent version from the recent releases.
If you are on Linux, you may need to set the +x permission on the downloaded QField build:
- Open this QField build, go to the Plugins Manager and install the
QField plugin reloader:
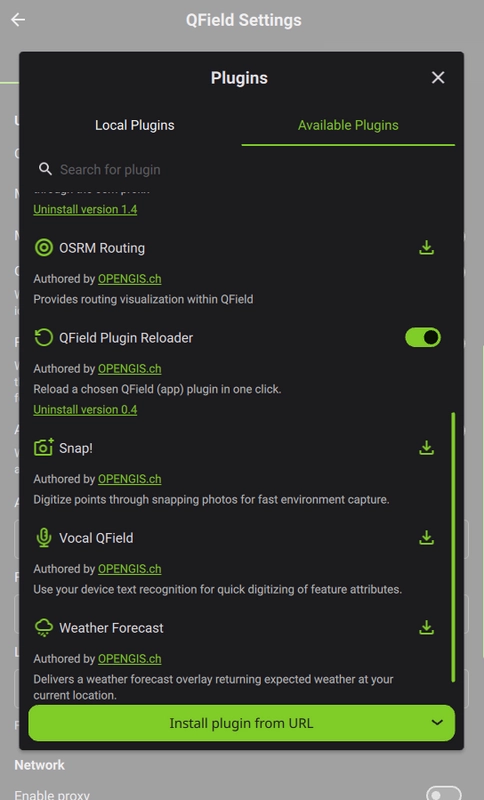
- Create a symbolic link from the generated plugin directory into the QField plugins directory:
ln -s /path/to/the/generated/directory/qfplugin-my-topologizer/my-topologizer \
    "/home/user/Documents/QField Documents/QField/plugins"
Note
- The QField plugins directory is located in the
QField Documentsdirectory, which is created in your home when you first run QField. If you have changed the location of this directory, please adapt the command above accordingly. - The symbolic link must point to the plugin directory, not the parent directory. In this example, the plugin directory is
my-topologizer, which is inside the generated directoryqfplugin-my-topologizer.
Test locally
Note
QGIS4 must be installed on the machine for testing! See installation instructions.
- Install
uvlocally:
- Create local virtualenv with system packages and sync:
- Add system packages to local virtual env (hacky):
SITE_PACKAGES=$(uv run python -c "import site; print(site.getsitepackages()[0])")
echo "/usr/share/qgis/python" > "$SITE_PACKAGES/qgis.pth"
- Test that imports are fine:
uv run python -c "import qgis; print(qgis.__file__)"
uv run python -c "import PyQt6; print(PyQt6.__file__)"
uv run python -c "from PyQt6.QtCore import QT_VERSION_STR; print(QT_VERSION_STR)"
- Clone QField locally, e.g.:
- Run tests:
Translate the plugin
- install the required tools:
- configure the
translations.progenerated file with the languages you want to support, located inside theqfplugin-my-topologizer/my-topologizer/generated plugin directory.
For instance, to support French and German, set the TRANSLATIONS variable to the following:
- generate the translations strings:
Note
If you have both Qt5 and Qt6 tools installed, make sure you use the Qt6 ones, e.g. by using /usr/lib/qt6/bin/lupdate on Linux.
- open the generated
.tsfiles withQt Linguist, using the GUI or the command line:
Note
If you have both Qt5 and Qt6 tools installed, make sure you use the Qt6 ones, e.g. by using /usr/lib/qt6/bin/linguist on Linux.
- compile the translations to
.qmfiles:
Or process each .ts file individually:
Note
If you have both Qt5 and Qt6 tools installed, make sure you use the Qt6 ones, e.g. by using /usr/lib/qt6/bin/lrelease on Linux.
Bump a new release
-
Make sure the
versionkey is updated in the plugin'smetadata.txtfile. -
Make sure the
pyproject.tomlversion is updated, e.g. withuv version --bump minor. -
Create a new tag on the
mainbranch, e.g.git tag 0.2, then push it viagit push origin 0.2.
If GitHub is the CI platform
The release CICD workflow will then automatically create the release.
If GitHub is the CI platform
It is recommended to regularly prune the tags locally with git fetch --prune --prune-tags, since PR workflows might create some temporary ones.